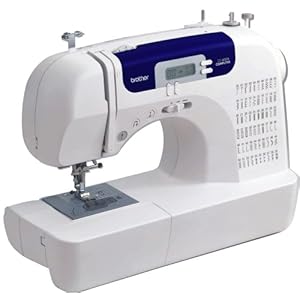
Did I tell you I bought a new sewing machine? No? I did! And it is awesome. My sister from another mister Kim recommended the one she got several months back. I'm so glad I did. It is amazing using a machine that is so simple and intuitive. I only got it last Friday and I've already used it three times. What machine you ask?
This machine!
Ah, so beautiful. I love it. Ok, enough Sewing Machine lust.
On Sunday I took a Sewing 101 class at JoAnn's. I basically learned how to use my new machine - winding the bobbin, threading the needle, tension, stitches, straight lines, etc. We didn't produce anything, but it was a great two hours of playing with the different functions of the machine.
Tonight I took a follow up class, Sewing 102. Our goal - to make a pillow. From a pattern. I had never used a pattern before, so I was excited to rip into it. We first cut out all the pieces of the pattern. We had to do two squares for the front and back of the pillow sham. We had to slightly enlarge the pattern - the pattern was for a 15 inch pillow, which don't exist. So we increased the size of the pillow by a half inch on either side to accommodate at 16 inch pillow, hence the larger fabric than pattern.
For the back of the sham, we went with the overlapping pieces for closure, rather than sewing it call closed together. I'll show later.
The other pieces were for the embellished part of the pillow - 7 circles in gradually smaller sizes.
Then it was a matter of sewing our circles on the front piece of the sham, starting with the largest. Sewing, sewing, sewing....
After all the circles were sewed on, we removed the fabric markings with a damp paper towel. Next was the back of the sham. We took our back piece, which we cut larger than the front piece and then cut that piece in half. We hemmed one side of each of those pieces. After those were hemmed we pinned the back piece and front piece together. Now it was time for the last go, making straight stitches and pivots around the corners of the pillow.
Then BAM! We were done! We turned our shams right side out, stuffed with the pillow form, and admired our hard work.
Brought home my prize project and put it on the couch.
This is the back of the pillow - you can see how the two overlapping seams cover the pillow. Not sure what the technical name for it is.
And closed up tight, looking nice and sleek.
I'm so excited my first project was such a brilliant success. I can't wait to try something else!


No comments:
Post a Comment